LEMP stack + phpmyadmin with Ubuntu 20.04 on azure virtual machine
LEMP stack configuration with phpmyadmin on Ubuntu 20.04 azure virtual machine.
1. Create an ubuntu 20.04 virtual machine on azure
For the first step we need to create first the ubuntu virtual machine, you can follow the guide here:
- Log in to your azure portal account
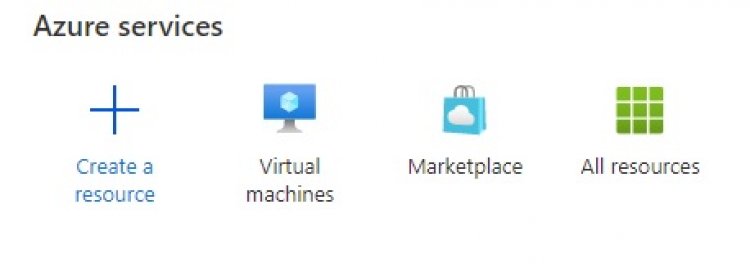
- navigate to azure services and click virtual machine

- Click create and select virtual machine

- fill up the form

- create a new resource group (you can link all services with this group)
- select ubuntu 20.04 for the image
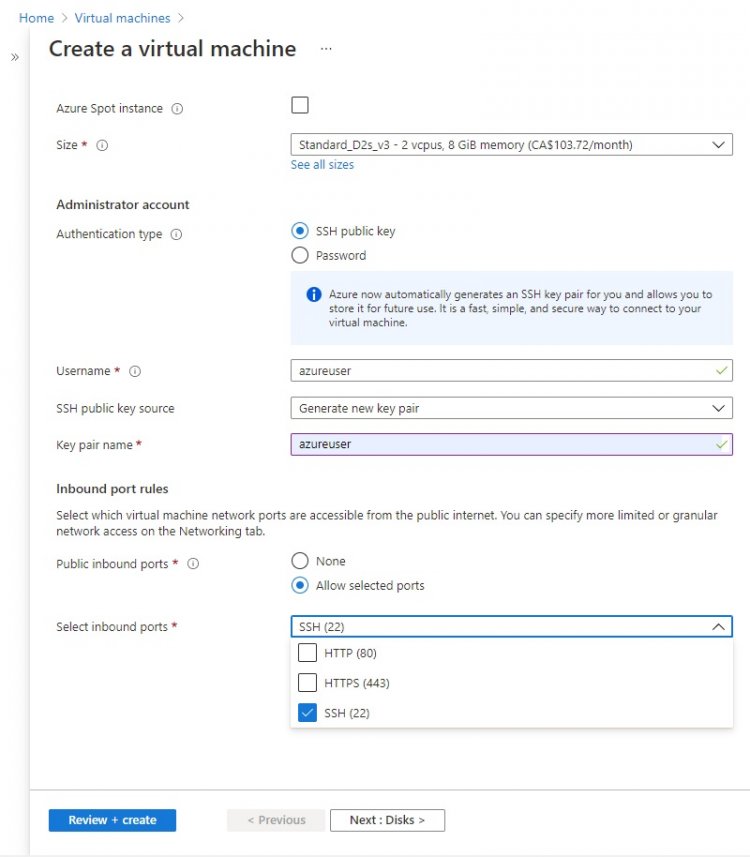
- for size you can use the Standard D2s_v3
- use ssh as authentication type
- for inbound ports select "Allow selected ports"
- for the ports select HTTP, HTTPS, and SSH

- click Review + create
- fill up the form and click create
- wait for azure to configure your vm
- and your done (Congratiolations !!!)
2. Install nginx
Why choose LEMP stack instead of a LAMP one?
For those who are wondering what is the difference between a LEMP and a LAMP stack for the main part it's their web server LEMP uses NGINX (Engine-x) while LAMP uses APACHE. why choose NGINX then well for the first reason is preferrence, maybe for you it's easier to use APACHE because you are trained in that environment but as a preference of mine i use NGINX. second is NGINX is easier to configure and maintain than APACHE because most of nginx runned websites are repairable by just some line in nginx it self while APACHE referrences a lot in order to fix or maintain a certain aspect of the stack.
Let us first install NGINX (Engine - X)
- Make sure you have administrator previleges: sudo -s
- run sudo apt update
- then sudo apt install nginx
When prompted, enterYto confirm that you want to install Nginx. Once the installation is finished, the Nginx web server will be active and running on your Ubuntu 20.04 server. - enable ufw run : sudo ufw enable
- then sudo ufw app list
The output should be like this:
To Action From -- ------ ---- OpenSSH ALLOW Anywhere Nginx HTTP ALLOW Anywhere OpenSSH (v6) ALLOW Anywhere (v6) Nginx HTTP (v6) ALLOW Anywhere (v6) - now try http://server_domain_or_IP
3. Install MySQL
Now that you have a web server up and running, you need to install the database system to be able to store and manage data for your site. MySQL is a popular database management system used within PHP environments.
- run sudo apt install mysql-server
When prompted, confirm installation by typingY, and thenENTER. - now sudo mysql_secure_installation
This will ask if you want to configure theVALIDATE PASSWORD PLUGIN.
AnswerYfor yes, or anything else to continue without enabling.
If you answer “yes”, you’ll be asked to select a level of password validation. Keep in mind that if you enter2for the strongest level, you will receive errors when attempting to set any password which does not contain numbers, upper and lowercase letters, and special characters, or which is based on common dictionary words. - For the rest of the questions, press
Yand hit theENTERkey at each prompt. This will remove some anonymous users and the test database, disable remote root logins, and load these new rules so that MySQL immediately respects the changes you have made. - try sudo mysql
- This will connect to the MySQL server as the administrative database user root, which is inferred by the use of
sudowhen running this command. - To exit the MySQL console, type: exit
4. Install php-fpm
You have Nginx installed to serve your content and MySQL installed to store and manage your data. Now you can install PHP to process code and generate dynamic content for the web server.
To install the php-fpm and php-mysql packages, run: sudo apt install php-fpm php-mysql
5. Configuring Nginx to Use the PHP Processor
- Create the root web directory for your_domain as follows: sudo mkdir /var/www/your_domain
- Next, assign ownership of the directory with the $USER environment variable, which will reference your current system user: sudo chown -R $USER:$USER /var/www/your_domain
- Then, open a new configuration file in Nginx’s
sites-availabledirectory using your preferred command-line editor. Here, we’ll usenano: sudo nano /etc/nginx/sites-available/your_domain - This will create a new blank file. Paste in the following bare-bones configuration:
server { listen 80; server_name your_domain www.your_domain; root /var/www/your_domain; index index.html index.htm index.php; location / { try_files $uri $uri/ =404; } location ~ \.php$ { include snippets/fastcgi-php.conf; fastcgi_pass unix:/var/run/php/php7.4-fpm.sock; } location ~ /\.ht { deny all; } } - Now go to your browser and access your server’s domain name or IP address, as listed within the
server_namedirective in your server block configuration file:http://server_domain_or_IP
6. Install phpmyadmin
You can install phpMyAdmin by using APT to download the phpmyadmin package from the default Ubuntu repositories.
- run sudo apt update
- then sudo apt install phpmyadmin
- During the installation process, you will be prompted to choose a web server (either Apache or Lighttpd) to configure. phpMyAdmin can automatically make a number of configuration changes to ensure that it works correctly with either of these web servers upon installation. However, because you are using Nginx as a web server you shouldn’t choose either of these options. Instead, press
TABto highlight theand then press ENTERto continue the installation process.
Next, you’ll be prompted whether to usedbconfig-commonfor configuring the application database. Select. This will set up the internal database and administrative user for phpMyAdmin. You will be asked to define a new password for the phpmyadmin MySQL user, but because this isn’t a password you need to remember you can leave it blank and let phpMyAdmin randomly create a password. - run sudo ln -s /usr/share/phpmyadmin /var/www/your_domain/phpmyadmin
- try server_domain_or_IP/phpmyadmin
As for my personal experiece on this part there is always an error so try using the method provided by digitalocean for the most part it works all the time but it is advisable to connect to your server via ssh using putty because the pop-ups do not appear on most console applications. and further configuration can be done if you proceed with the digitalocean referrence.
Drake, M., & Heidi, E. (2021, June 18). How To Install and Secure phpMyAdmin with Nginx on an Ubuntu 20.04 Server. DigitalOcean. https://www.digitalocean.com/community/tutorials/how-to-install-and-secure-phpmyadmin-with-nginx-on-an-ubuntu-20-04-server


