Build Tracking App in 5 minutes
You can build a tracking app in less than 5 minutes with Flutter and firebase

In this article we will build a tracking app with Flutter as frontend and Firebase as backend in less than 5 minutes.
Most of the food delivery app's trend is it's realtime geolocator for the sole purpose of locating the delivery driver's current location to inform the customer/client where he/she is and know the duration of time the client will wait before the food arrives.
Lets get started
As I mentioned above we will be using those frameworks and toolkit in this development. I am using the latest version of flutter in this dev so if any of you experience package conflict using this code might as well upgrade your dart sdk to 2.12.0.
I am using Android Studio as my IDE but you can use any of your IDE's if you want.
We will be having 2 apps in a single code base web will be the tracker and mobile phone will be the driver.

The very first thing to do is to open your IDE (Android Studio for me). and open terminal and run the code above. Note that "qonvex_realtime_app" will be the name of your app.
The alternative way to do this is to go to Android Studio's File >> New >> New Flutter Project (Note: This will only be available if you enable it in your Android studio's Preferences).
Open the file in your IDE and you should be getting these files and folders which is generated by flutter itself.
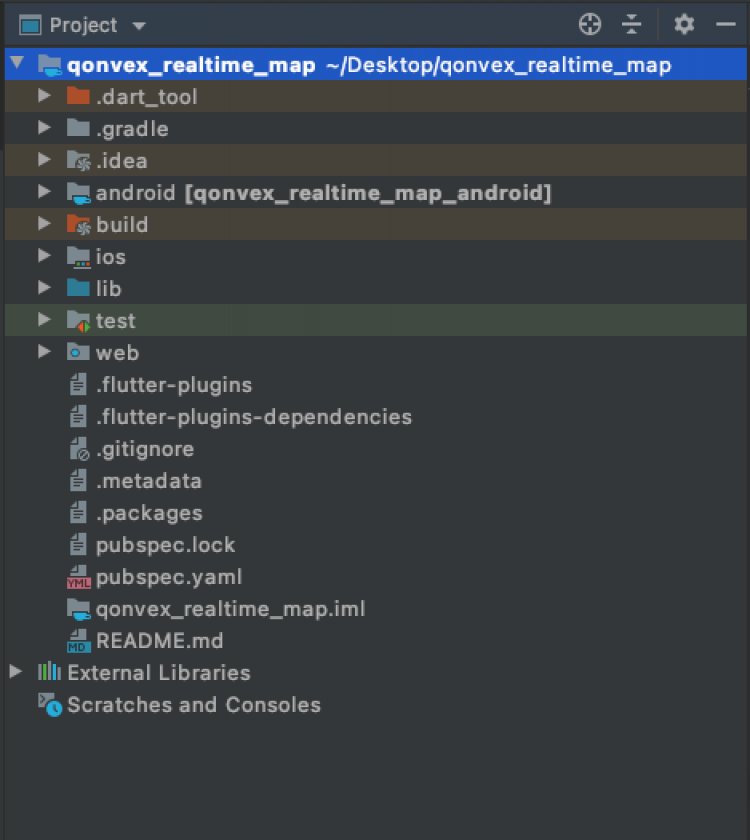
As you can see you get a web folder, this also will be the web tracker as per I mentioned above and if you havent enabled the web features yet please check this documentation on Building a Web application With Flutter.
We will do this fast and build it mainly in your main.dart file.
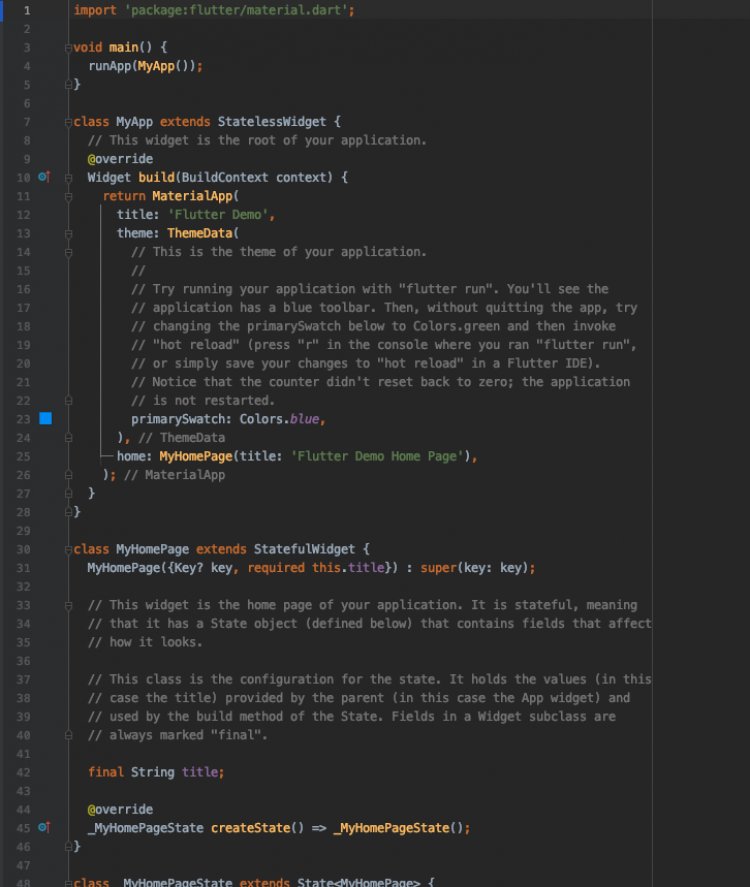
This is the default script inside the main.dart file.
Open pubspec.yaml file and lets import all the packages needed. for this project we will be needing the following:
- geolocator: ^7.1.0 - Used to fetch and listen on the device's current location;
- google_maps_flutter: ^2.0.6 - Use google api's and google map for displaying;
- cloud_firestore: ^2.2.2 - Firebase database connection; and
- firebase_core: ^1.3.0 - necessary to check firebase connection.
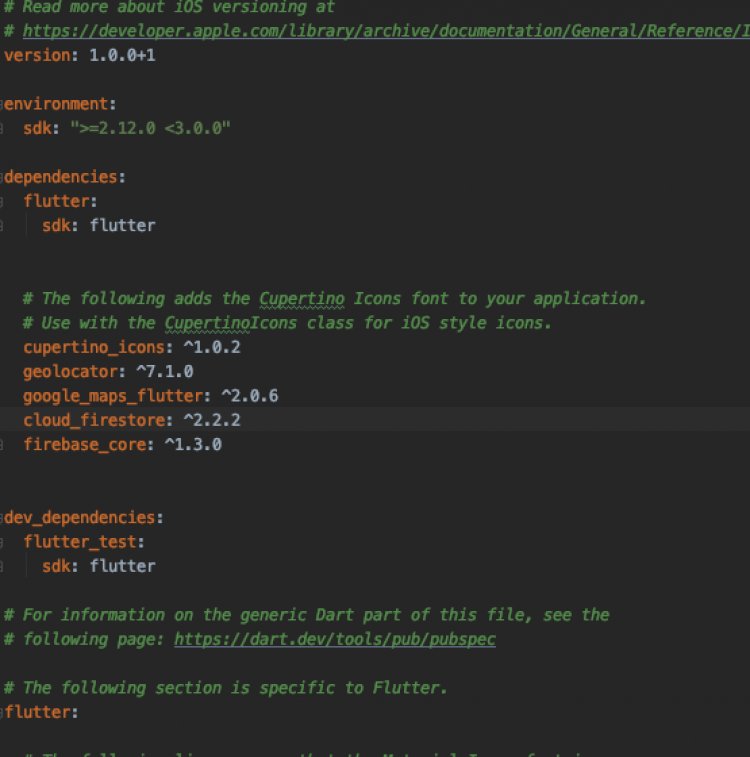
after this run flutter pub get to get the dependencies from the packages we imported above.
Now lets go back to our main.dart file and follow the steps.
First import the packages we added in our pubspec.yaml

Next in our main function we need to call WidgetsFlutterBinding.ensureInitialized() this is to make sure in our mobile app we run the firebase initializer before our widget builder, and our main function should look like this.
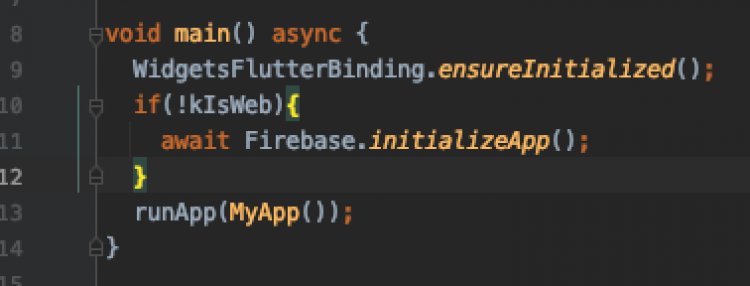
You might see be wondering what is this "kIsWeb", kIsWeb is Flutter's way to check if you are running the app as web app or mobile app, as for this one we highlighted !kIsWeb to indicate that the script/program should execute await Firebase.initializeApp(); before our mobile app runs and build its widgets. in web this is not necessary anymore.
Next is to tinker our app's main view and instantiate our imported packages. Follow the steps below:

Instantiating Firebase Firestore to have the priviledge to connect to our firebase database which will be shown later on this topic.

Note: Firebase iniitializeApp was called here as a Future this is to ensure that both the web and mobile app has initialized firebase to avoid future conflict with the firebase database.

Next is to get the collection from firebase database.
After this we will first go to our Firebase Console to setup our database and get the files needed to connect or sync to our database.
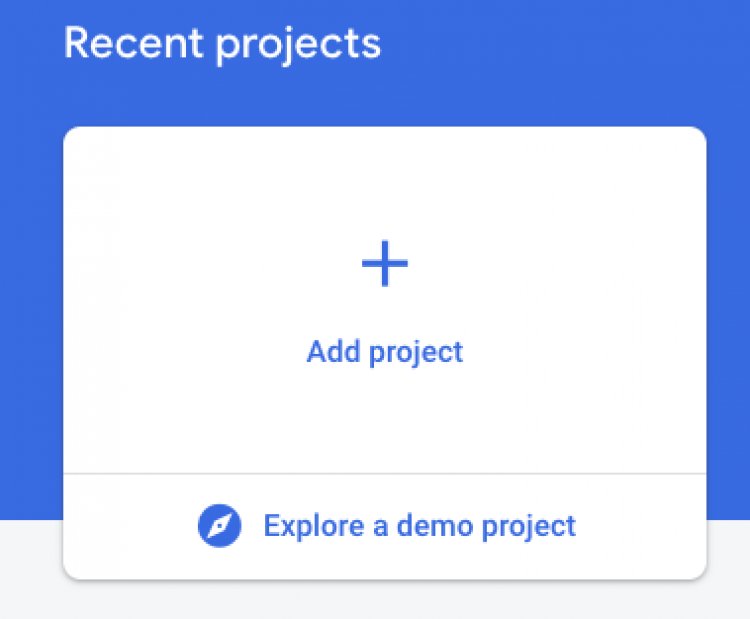
We need to create/add a new project or if you already have an existing app that we can use you can just go directly to it and download the files needed such as:
- google-service.json for Android;
- GoogleService-Info.plist for IOS; and
- for the web we only need to copy the firebase config script.
I will not state here how to import those files to our mobile app since firebase has the instructions for this one. But in the web part we will just copy it inside web >> index.html.

After this we should be prompted to firebase console's dashboard and check the side nav and you will see Firestore Database.
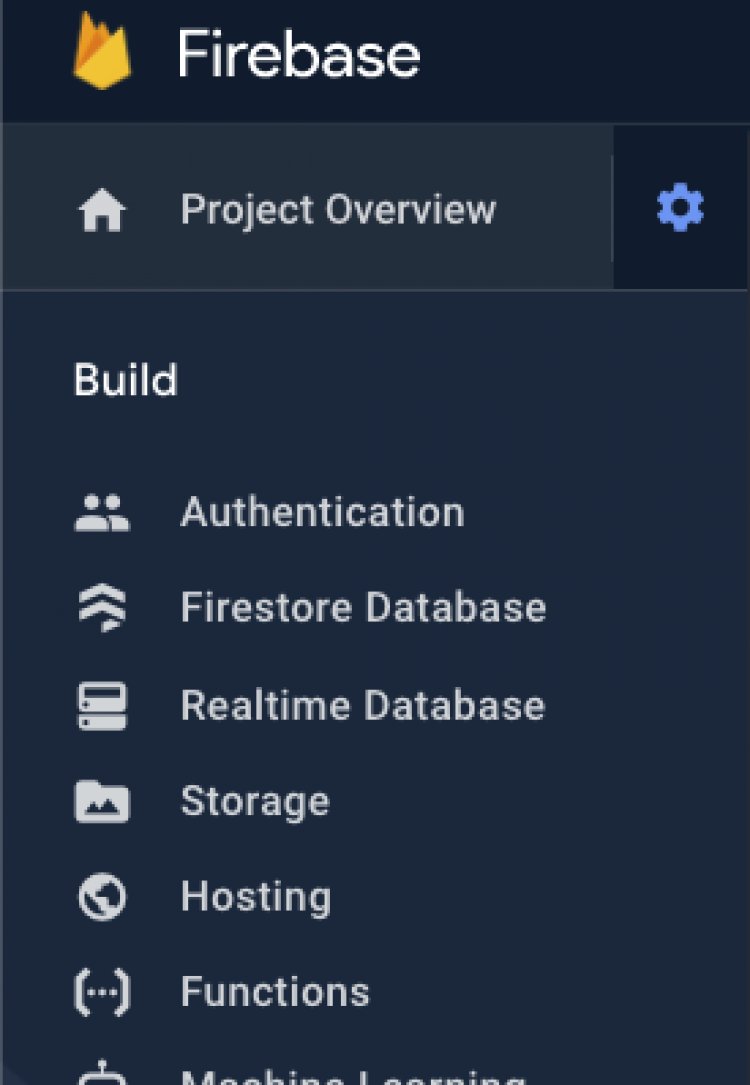
Click Firestore database and you will see this display.

After this it should be obvious right? I mean our next move, which is create database. After you click on "Create database" a dialog box wil be shown asking if you want to make your database in production mode or in test mode
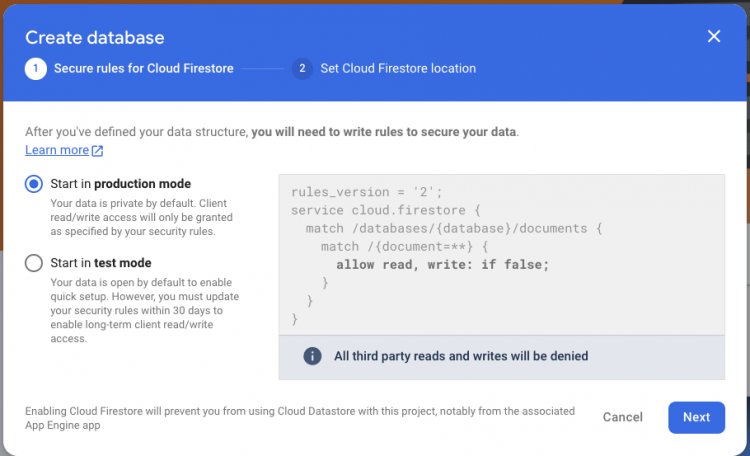
Based from the description of each modes, you should already know what you will choose, but for us we will choose test mode, I am not saying do not choose production mode because either way is fine, yes, it is fine because in production mode you can edit the rules and make the permission like the test mode, albeit, we will use test mode for professionality's sake and also our programs integrity.

After choosing the rules and the mode another dialog box will be displayed and will ask you to choose location, for me I will be using eur3 since it has a multi region access.
Next is to create/start a collection as you remembered we have instantiated a Collection Reference in our main.dart above right? change the name of your collection based on the name you will be creating in your firestore database and it'll be good to go.
And now we will be goid back to our main.dart and do the rest. After finishing the setup in firebase we will now start our position/location listener.
We will be naming our function as _determinPosition() but you can always choose your desired name. And the code should look like this.
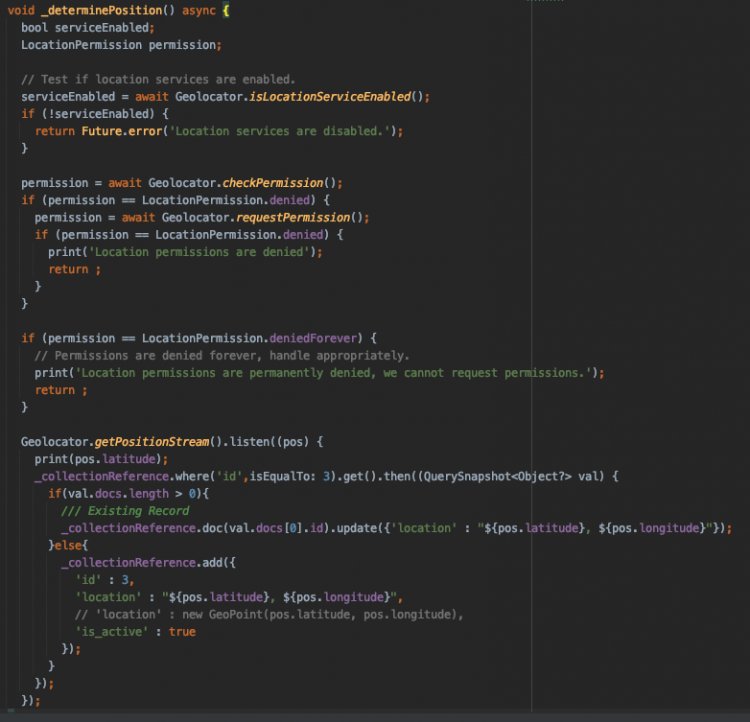
You will notice in our Geolocator.getPositionStream() function we have some queries from our collection reference right? Now, this is to check if an existing id is in the collection or not, if yes the location field will be updated to your current location and if it does not exist it will simply create and update your current location to our database.
Next we will be calling our position checker, but when or where? well, the most logical way to call it is when we initialize our app, yes you got it right we will be calling this inside our initState function, and make sure that this will only be called if we are running it in our mobile app, for the web app will only be our tracker or our client and the mobile will become our driver (this is just an example).
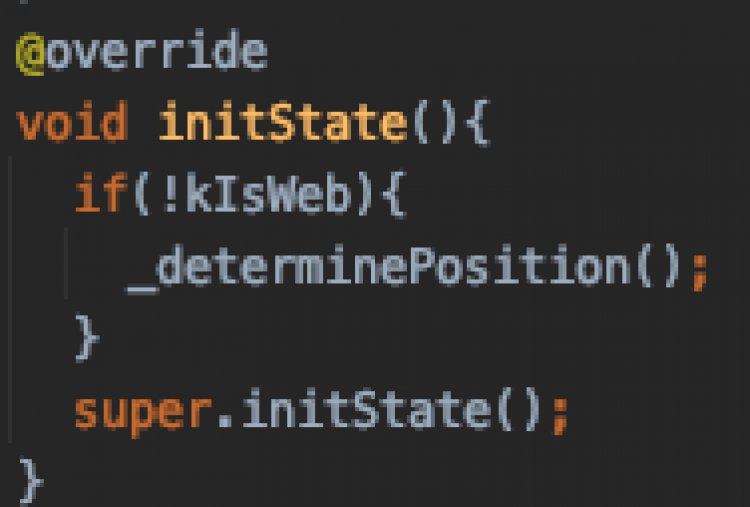
Code should look like this.
We will now setup our google maps in our web, to do that we will be adding google_maps_flutter_web in our pubspec.yaml.
NOTE: Do not remove google_maps_flutter because the web version is dependent to it.
![]()
Next is to add our google api key in our web app, here we will be calling it in web >> index.html same with what we did when we added our firebase and firestore to our web app, just add a script containing your api key like the image below:

You can get an api key at Google Console, this is necessary to access/use google maps feature.
We are now done with our functions and dependencies setup its time to build our UI.
Widget build(BuildContext context) {
  return Scaffold(
     body: FutureBuilder(
        future: _firebaseInit,
        builder : (_,snapshot){
           if(snapshot.hasError){
            return Center(
              child: Text("ERROR ${snapshot.error}"),
            );
          }
          if(snapshot.connectionState == ConnectionState.done){
             return Center(
                      child: Text("Firebase OK"),
             );
          }
          return Center(
            child: CircularProgressIndicator(),
          );
        }
     )
  );
}
in this code we will be checking if firebase is properly integrated or not. After this we will be proceeding to our next step which is listening to firestore collection data but since only our web app can track the driver means our web app is the only one who will listen to our collection.
if(snapshot.connectionState == ConnectionState.done){
      if(kIsWeb){
          /// this is our listener
          return StreamBuilder();
      }else{
         /// this is our mobile view
         return Container();
      }
}
We will now integrate our listener to our web app
if(kIsWeb){
              return StreamBuilder(
                stream: _collectionReference.snapshots(), /// as you can see this script here became our stream which means we will be able to listen to changes from here
                builder: (_, firestoreSnap) {
                  if (firestoreSnap.hasError) {
                    return Center(
                      child: Text("SERVER ERROR : ${firestoreSnap.error}"),
                    );
                  }
                  if (firestoreSnap.hasData) {
                    /// We ready the google map
                  }
                  return Center(
                    child: Text("Connecting..."),
                  );
                },
              );
            }
Now that we are ready to build our google map we will now proceed to the next step, converting the snapshot data into an object and parse that object to become our model. But first we will need to create our model which will hold our data from the firestore database. The code should look like what we provided below.
NOTE: You can do this in a separate file or outside our Current Working Class
class RealtimeLocationData {
  final int id;
  final String? location;
  bool isActive;
  RealtimeLocationData({required this.id,required this.location, required this.isActive });
  factory RealtimeLocationData.fromJson(Map<String,dynamic> parsedJson){
    return RealtimeLocationData(
      id : int.parse(parsedJson['id'].toString()),
      location : parsedJson['location'] is String ? parsedJson['location'] : null,
      isActive : parsedJson['is_active'] == null ? false : parsedJson['is_active'],
    );
  }
  Map<String,dynamic> toJson()=>{
    'id' : id,
    'location' : location,
    'is_active' : isActive,
  };
}
Since we got our model its time for some parsing
if (firestoreSnap.hasData) {
  List data = firestoreSnap.data!.docs.toList().map((DocumentSnapshot documentSnapshot) {
                      Map<String, dynamic> mappedData = documentSnapshot.data() as Map<String, dynamic>;
        return RealtimeLocationData.fromJson(mappedData);
    }).toList();
}
What happened here? First we traverse the data given from firestore with "firestoreSnap.data!.docs.toList().map" it will give us an element with a type of DocumentSnapshot which will become the source of data to our model RealtimeLocationData, next we assigned the data from the document to our mappedData which will take Map<String, dynamic> then the mappedData becomes the data given to our factory parser "fromJson". Now the data contains of type RealtimeLocationData which we will be needing to our Google map data.
Next we will be building our markers for our map.
Set markers; /// Instance of Marker is now created
markers = data.map((e) => new Marker(
                        markerId: MarkerId("${e.id + Random().nextInt(20)}"),
                        visible: e.isActive,
                        position: LatLng(double.parse(e.location!.split(',')[0].toString()),double.parse(e.location!.split(',')[1].toString())
))).toSet();
Since we already got our source we will now create a SET of markers from our List of RealtimeLocationData and assign all the required data to our markers.
Notice that Random() method inside our markerId? why do we need to put random in that? the answer is Google map check every id of a marker in order to check its uniqueness but we need our app to be realtime so each time our stream has a new event it should generate a different value to update the current location of the marker.
And now it's time for our google map to be displayed.
final Completer _controller = Completer();We need to create a Completer Instance that accepts google map controller for this to work. Then after this we will now go to our google map integration.
return GoogleMap(
                      onMapCreated: (controller) {
                        _controller.complete(controller);
                      },
                      myLocationButtonEnabled: true,
                      rotateGesturesEnabled: true,
                      initialCameraPosition: CameraPosition(
                        target: LatLng(48.864716, 2.349014),
                        zoom: 15.0,
                      ),
                      buildingsEnabled: true,
                      mapType: MapType.none,
                      myLocationEnabled: true,
                      markers: markers,
                    );
The argument given to markers (also named markers) is the markers we created a while ago.
and now our app is finished!
for the repo you can visit it here : QonvexTech/qonvex_realtime_map


